Articles > DIY Furniture Projects
DIY furniture making is a creative and fulfilling hobby for individuals interested in designing and constructing their own furniture pieces. This brief overview will outline the key steps and considerations involved in the process.
Firstly, it is vital to plan the project carefully. This includes deciding on the type of furniture, its dimensions, and the materials required. Additionally, considering the available workspace and tools is crucial to ensure a successful outcome.
Next, it is important to gather the necessary safety gear. When working with power tools and materials, safety should be a top priority. Safety glasses protect the eyes from flying debris, while earmuffs prevent hearing damage from loud tools. Dust masks help filter out harmful particles from the air, gloves provide hand protection, and steel-toe boots protect the feet from heavy falling objects.
Once equipped with the necessary safety gear, the actual construction process can begin. This involves accurately measuring and cutting the materials, assembling the pieces together, and securing them with nails, screws, or adhesives. Sanding the surfaces and applying finishes like paint or varnish will give a professional and polished look to the furniture.
In summary, DIY furniture making involves careful planning, acquiring the proper safety gear, and executing the construction process with precision. Remember to prioritize safety at all times when engaging in this enjoyable endeavor.
Creating your own furniture pieces offers numerous benefits that are sure to enhance your lifestyle and surroundings. Firstly, there is an immense sense of satisfaction that comes from creating something from scratch. Building your own furniture allows you to take pride in your work and have a tangible result at the end of the process.
Moreover, crafting furniture provides you with the opportunity to learn new skills. From measuring and cutting wood to assembling and finishing, you can gain valuable knowledge and expertise in woodworking. This hands-on experience can be applied to future projects and even shared with others.
In addition, designing and building your own furniture gives you the freedom to express your creativity. You can customize each piece to reflect your unique style and taste. Whether you prefer sleek and modern or rustic and traditional, you have the ability to bring your vision to life and create a truly one-of-a-kind piece.
Furthermore, creating your own furniture allows you to customize the look and style to perfectly suit your needs and space. You can choose the dimensions, colors, and finishes that complement your existing decor or create a cohesive design scheme. This level of personalization ensures that each piece is functional and aesthetically pleasing.
Lastly, by building your own furniture, you have the option to choose high-quality materials. You can select durable and sustainable materials that will result in long-lasting and sturdy furniture. This not only enhances the overall quality of your pieces but also ensures that they withstand the test of time.
In conclusion, the benefits of creating your own furniture pieces are manifold. From the satisfying feeling of accomplishment to the opportunity to learn new skills, express creativity, customize the look and style, and choose high-quality materials, crafting furniture brings immense joy and fulfillment.
the Perfect Ambiance for Your Home
Introduction:
When it comes to creating the perfect ambiance for your home, selecting the right piece of furniture is crucial. Furniture has the power to enhance the overall aesthetics of your living space and set the desired mood. Whether you are looking for a cozy and inviting atmosphere or a sleek and modern look, choosing the perfect piece of furniture can make all the difference. In this article, we will explore some key factors to consider when selecting furniture to create the perfect ambiance for your home.
When choosing a furniture project, there are several considerations to keep in mind. Firstly, it is important to consider your skill level and experience with woodworking. Starting with a small and simple project that matches your skill level is crucial. This allows you to build confidence and improve your skills before taking on more complex projects. Additionally, it is key to choose a project that can be completed in a reasonable amount of time. This not only ensures that you stay motivated throughout the process, but also allows you to learn and practice new techniques more efficiently.
Functionality is another important factor to consider. Think about what the purpose of the furniture piece will be and how it will fit into the overall design of the space. For example, a beginner project could be a simple side table with a flat top and a lower shelf for added storage. This project provides functionality while also being manageable for someone with basic woodworking skills.
Cost is another consideration to keep in mind. Woodworking can be an expensive hobby, especially if you are just starting out. Opting for projects that require less expensive materials or repurposing old furniture can help keep costs down. For instance, refurbishing an old dresser by sanding it down and applying a fresh coat of paint can be a great way to start.
In conclusion, when choosing a furniture project it is important to consider your skill level, the project's complexity, functionality, and cost. By starting with a small, simple project that aligns with your skill level and can be completed in a reasonable amount of time, you can ensure a successful and rewarding woodworking experience.
Popular DIY furniture projects for beginners are a great way to unleash creativity and add personal touches to a living space. One such project is building a bookshelf. Novice furniture builders can approach this project by using pre-cut lumber and assembling it with screws and wood glue. Simple designs like open or ladder-style bookshelves are great for beginners as they require minimal tools and provide ample storage space.
Another popular project is making a coffee table. Beginners can approach this project by repurposing old wooden crates or pallets. By simply sanding down any rough spots and adding a few coats of paint or stain, novices can create a unique and functional piece of furniture. Adding casters to the bottom of the table provides mobility and convenience.
A favorite project among beginners is building a dining table. This can be approached by using reclaimed wood or purchasing pre-cut lumber. Novices can follow online plans or tutorials to assemble the table legs and attach the tabletop, ensuring stability with the use of brackets or screws.
Overall, these DIY furniture projects for beginners are famous for their approachability and versatility. By starting with these projects, novices can gain confidence in their woodworking skills and explore more complex designs in the future.
Introduction:
Gathering Your Materials and Tools is an essential step in any project, whether it be a simple task or a complex endeavor. The success and efficiency of the project heavily rely on having the necessary materials and tools at hand. This process involves identifying and collecting all the items required to complete the task, ensuring that nothing is left behind. By adequately preparing and organizing your materials and tools, you can save time, minimize disruptions, and enhance the overall productivity of your project. In the following sections, we will delve into the importance of gathering the right materials, as well as provide practical tips and suggestions to streamline this crucial step.
DIY furniture making can be a rewarding and fulfilling hobby. However, it is crucial to have the right tools to ensure safety and achieve quality results. Here is a list of essential tools that every DIY furniture maker should have in their arsenal:
1. Safety Glasses: Protect your eyes from flying debris, sawdust, and chemical splashes. Safety glasses with side shields provide maximum protection.
2. Earmuffs: Reduce the risk of hearing damage caused by loud machinery and power tools. Invest in earmuffs that offer both comfort and effective noise reduction.
3. Dust Masks: Minimize inhalation of harmful dust particles and fumes. Look for masks with a high filtration efficiency and a comfortable fit.
4. Gloves: Protect your hands from cuts, splinters, and chemicals. Choose gloves made from durable and puncture-resistant materials that provide a good grip.
5. Steel-Toe Boots: Ensure foot safety while working with heavy materials and using power tools. Steel-toe boots provide impact protection and protect against accidental crushing.
Besides the safety gear mentioned above, there are other essential tools required for DIY furniture making. Some of these tools include a tape measure, chisels, saws, sanders, drills, clamps, a level, a square, and a workbench or sturdy table. It is important to invest in high-quality tools that are durable and designed for woodworking tasks.
Remember, safety should always be a top priority when engaging in DIY furniture making. By using the essential tools and wearing the proper safety gear, you can minimize the risk of accidents and achieve successful results in your furniture-making projects.
When it comes to choosing the right type of wood for your woodworking project, there are several factors to consider. First, let's discuss the different types of wood that are suitable for such projects.
Softwoods, such as pine and cedar, are readily available and relatively inexpensive. They are easy to work with due to their softer density, making them ideal for beginners. However, they may not be as durable or strong as hardwoods.
Hardwoods, on the other hand, offer a greater range of choices, including oak, maple, and cherry. They are known for their strength, durability, and beautiful grain patterns. Hardwoods can be more difficult to work with due to their density, but they can produce stunning results.
Exotic woods, such as teak or mahogany, offer unique characteristics and colors. These woods are harder to find and may be more expensive, but they can add a touch of luxury to your project.
When choosing the right type of wood for your project, consider the desired look and feel. Some woods have a lighter or darker color, while others may have a distinct grain pattern. Strength is another important factor, especially if your project requires load-bearing capabilities. Consider the weight of the wood if portability is a concern. Additionally, think about the workability of the wood and whether you have the necessary tools and skills to handle it.
Finally, factor in the cost of the wood. Softwoods are generally more affordable, while hardwoods and exotic woods can be pricier. Consider your budget and the overall value you wish to achieve with your project.
By considering the characteristics, availability, difficulty level, and cost of different types of wood, you can choose the right material for your woodworking project.
In addition to the basic materials mentioned in the Background Information, there are a few other materials needed for this project: wood glue and pocket hole screws. These materials are crucial for ensuring the strength and stability of the construction process.
Wood glue is an essential adhesive that is used to bond the wooden pieces together. It forms a strong and durable connection, making the overall project sturdier. Wood glue is especially useful when joining large or heavy pieces of wood, as it helps to distribute the weight evenly and prevent the joints from loosening over time.
Pocket hole screws, on the other hand, serve the purpose of securely connecting the wooden pieces. These screws have a special design that allows them to be hidden within the pocket holes, resulting in a clean and seamless finish. They provide added strength and stability to the joints, making the project less prone to wobbling or collapsing.
Both wood glue and pocket hole screws are essential for the success of this construction project. The wood glue ensures a strong bond between the wooden pieces, while the pocket hole screws provide additional support and stability. By using these materials in conjunction with the basic materials, you can create a sturdy and reliable structure that will last for years to come.
Designing your own furniture piece can be an exciting and fulfilling endeavor. Whether you are looking to create a custom piece that perfectly fits your space, or you simply have a passion for woodworking and want to expand your skills, designing furniture allows you to bring your vision to life. From selecting the materials to considering functionality and aesthetics, the process of designing your furniture piece involves careful planning and attention to detail. In this guide, we will explore the different steps involved in designing your furniture piece, providing you with the necessary tools and knowledge to embark on your own creative journey. Whether you are an experienced woodworker or a beginner just starting out, designing your furniture piece is a rewarding opportunity to showcase your talent and create a unique and personalized addition to your home or office.
When sketching out design ideas for furniture, it is important to start by visualizing where the furniture piece will be placed within a space. This will help determine the appropriate dimensions and overall design of the piece. Consider the existing decor, layout, and functionality of the room. Take into account the size and shape of the room, as well as any existing furniture or architectural elements that may impact the placement and dimensions of the new furniture piece.
Once you have a clear vision of where the furniture will reside, begin sketching out different design ideas. Start by roughing out basic shapes and proportions. Focus on capturing the overall essence and feel of the piece rather than getting caught up in small details at this stage. Play around with different styles, shapes, and materials to find the one that best suits the space and personal taste.
When modifying the dimensions to fit the space, it is important to maintain eye-pleasing general ratios. This means ensuring that the overall proportions are visually pleasing and harmonious. A good rule of thumb is to maintain a balance between the height, width, and depth of the piece. Customizing the sizes is crucial to maximize both aesthetics and comfort. Consider the scale of the other furniture in the room to ensure the new piece doesn't overpower or look out of place.
In conclusion, sketching out design ideas for furniture involves visualizing the placement within a space, modifying dimensions to fit the area, and maintaining eye-pleasing ratios. By considering these factors, you can create a customized furniture piece that is both visually appealing and functional in its intended space.
When starting a design project, it can sometimes be difficult to come up with new and creative ideas. Luckily, there are many online resources available that can provide inspiration and guidance to help get those creative juices flowing.
One fantastic resource is Pinterest. With its vast amount of images and ideas, Pinterest is a valuable tool for finding inspiration in design projects. Users can search for specific keywords or browse through various categories to find color schemes, styles, and overall mood for their projects. Whether you're looking for ideas for a logo design, website layout, or interior decor, Pinterest is a great starting point.
Another online resource for inspiration and guidance is Dribbble. This platform is primarily focused on graphic design and allows designers to showcase their work. It's a great place to discover new design trends, browse through different styles, and get inspired by the work of other creatives. Users can search for specific keywords or explore different categories to find ideas that suit their projects.
Lastly, Behance is another fantastic online resource for inspiration and guidance in design projects. Behance is an online platform where designers can showcase their portfolios, browse through other designers' work, and discover new trends and ideas. It's a great place to find color schemes, typography inspiration, and different design styles.
In conclusion, when looking for inspiration and guidance in design projects, online resources are an invaluable tool. Platforms like Pinterest, Dribbble, and Behance can provide a plethora of ideas for color schemes, styles, and overall mood. So, why not take advantage of these online resources and let your creativity thrive?
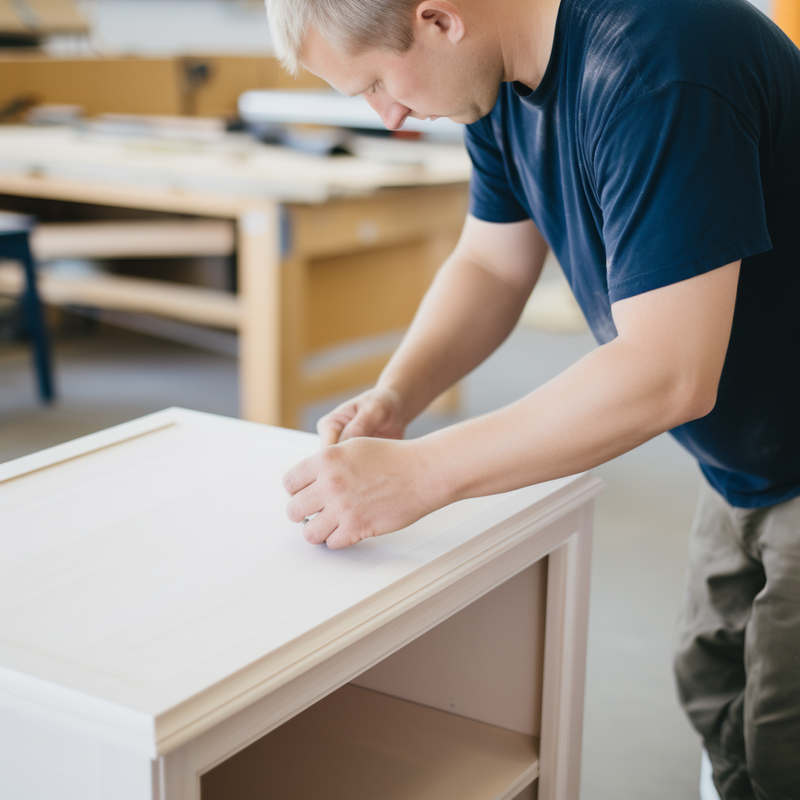
When it comes to woodworking projects, one of the most important steps is preparing the wood pieces. Proper preparation ensures that the wood is smooth, clean, and free from any imperfections. This allows for better alignment and a more professional-looking finished product. To prepare the wood pieces, there are several steps that need to be followed. These include selecting the right type of wood, measuring and cutting the pieces to the desired dimensions, sanding the surfaces to remove any rough spots, and finally, applying any necessary finishes or sealants. By taking the time to prepare the wood pieces correctly, you can ensure that your woodworking project will be a success.
When cutting hardwood plywood to size, it is important to ensure accurate cuts. To begin, gather all the necessary materials, including a tape measure, pencil, straight edge, and a circular saw or table saw with a fine-toothed blade suitable for cutting hardwood plywood.
First, measure the dimensions needed for the plywood piece. Place the plywood on a flat and stable work surface. Use the tape measure to measure the desired length and width, ensuring precise measurements.
Next, use the straight edge to mark the measurements on the plywood. Place the straight edge along the marked line and hold it firmly in place. Taking the pencil, draw a straight line along the edge of the straight edge. Repeat this process for all sides if necessary, ensuring the lines are clear and easy to follow.
Once the plywood is marked, it's time to cut it. If using a circular saw, set the blade depth to slightly deeper than the thickness of the plywood. If using a table saw, adjust the rip fence to match the desired width of the cut. Always refer to the manufacturer's instructions for using the specific tool.
When cutting, position the plywood on a stable surface and firmly hold it in place using clamps or a secure workbench. Align the blade of the saw with the marked line and slowly start cutting, applying gentle pressure. Ensure good visibility of the cutting line and maintain a steady hand to achieve accurate and even cuts.
After completing the cuts, check the dimensions of the plywood piece to ensure they match the required measurements. Make any necessary adjustments or refinements as needed. By accurately measuring, marking, and using the appropriate tools, cutting hardwood plywood to size can be done effectively and with precision.
Creating pocket holes for assembly is a simple process that requires a pocket hole jig, a drill, and some clamps. Pocket holes are widely used in woodworking projects to securely join pieces of wood together without the need for visible screws or nails.
To begin, determine the desired locations for the pocket holes on the pieces of wood that need to be joined. Mark these locations with a pencil or a piece of tape for accuracy.
Next, position the pocket hole jig over the marked locations. Make sure the jig is aligned with the edge of the wood and adjust the drill guide to the desired depth. The drill guide controls the depth of the pocket hole and ensures consistency throughout the project.
Once the jig is properly positioned, secure it in place using clamps. This will prevent any movement or shifting during the drilling process. Make sure the clamps are tight enough to hold the jig securely, but not so tight that they damage the wood.
To drill the pocket holes, insert the drill bit into the drill guide of the jig. Hold the drill firmly and start drilling at a slow speed, applying steady pressure. Drill until the desired depth is reached, usually indicated on the drill bit or the jig.
Once the pocket holes are drilled, remove the clamps and the jig. The pieces of wood are now ready for assembly. Simply insert the screws into the pocket holes and tighten them using a screwdriver or a drill.
In summary, creating pocket holes for assembly involves positioning the pocket hole jig, securing it in place with clamps, drilling the holes at the desired locations, and then using screws to join the pieces of wood together. This method provides a strong and hidden joint for woodworking projects.
 Author: Sebby Says